

How to Install Shiplap to Your Bedroom Ceiling
Contributed by The Watson Farmhouse
Royal® Building Products partnered with Tanner & Lindsay Watson, the owners and creators of The Watson Farmhouse, to provide PVC shiplap for the master bedroom in their Modern Farmhouse in Western Massachusetts. Follow along their renovation journey on their Instagram channel.
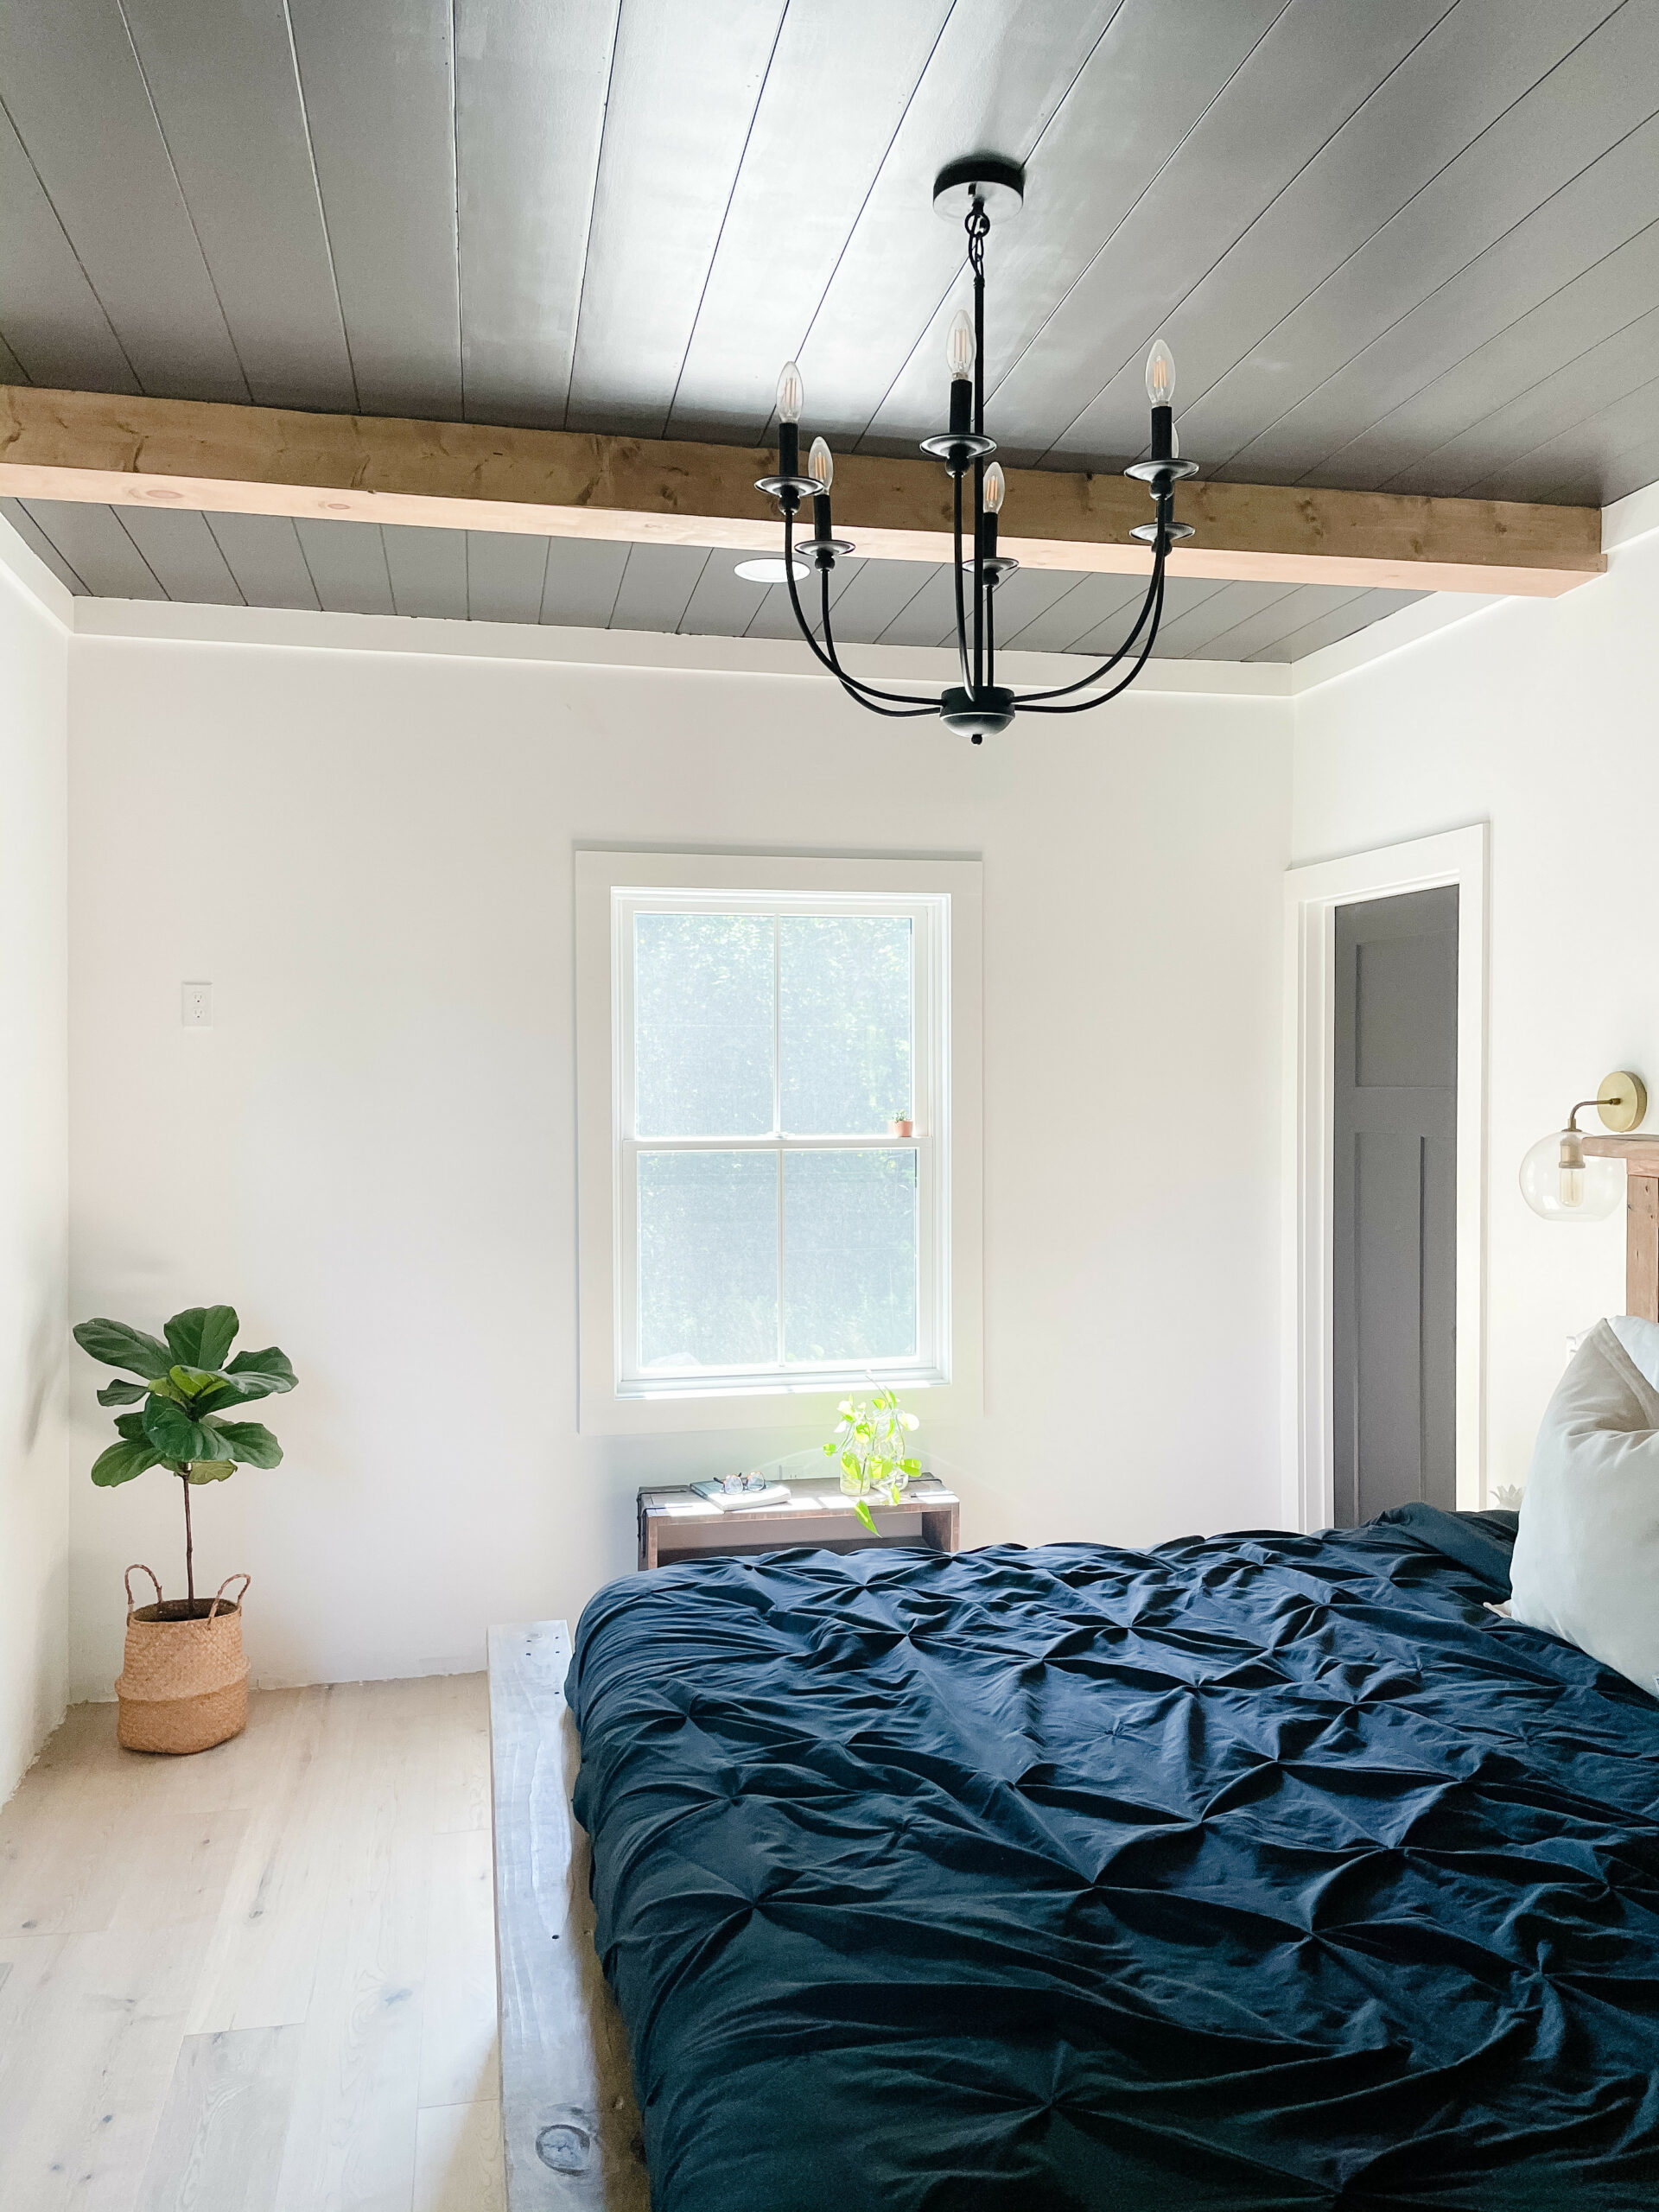
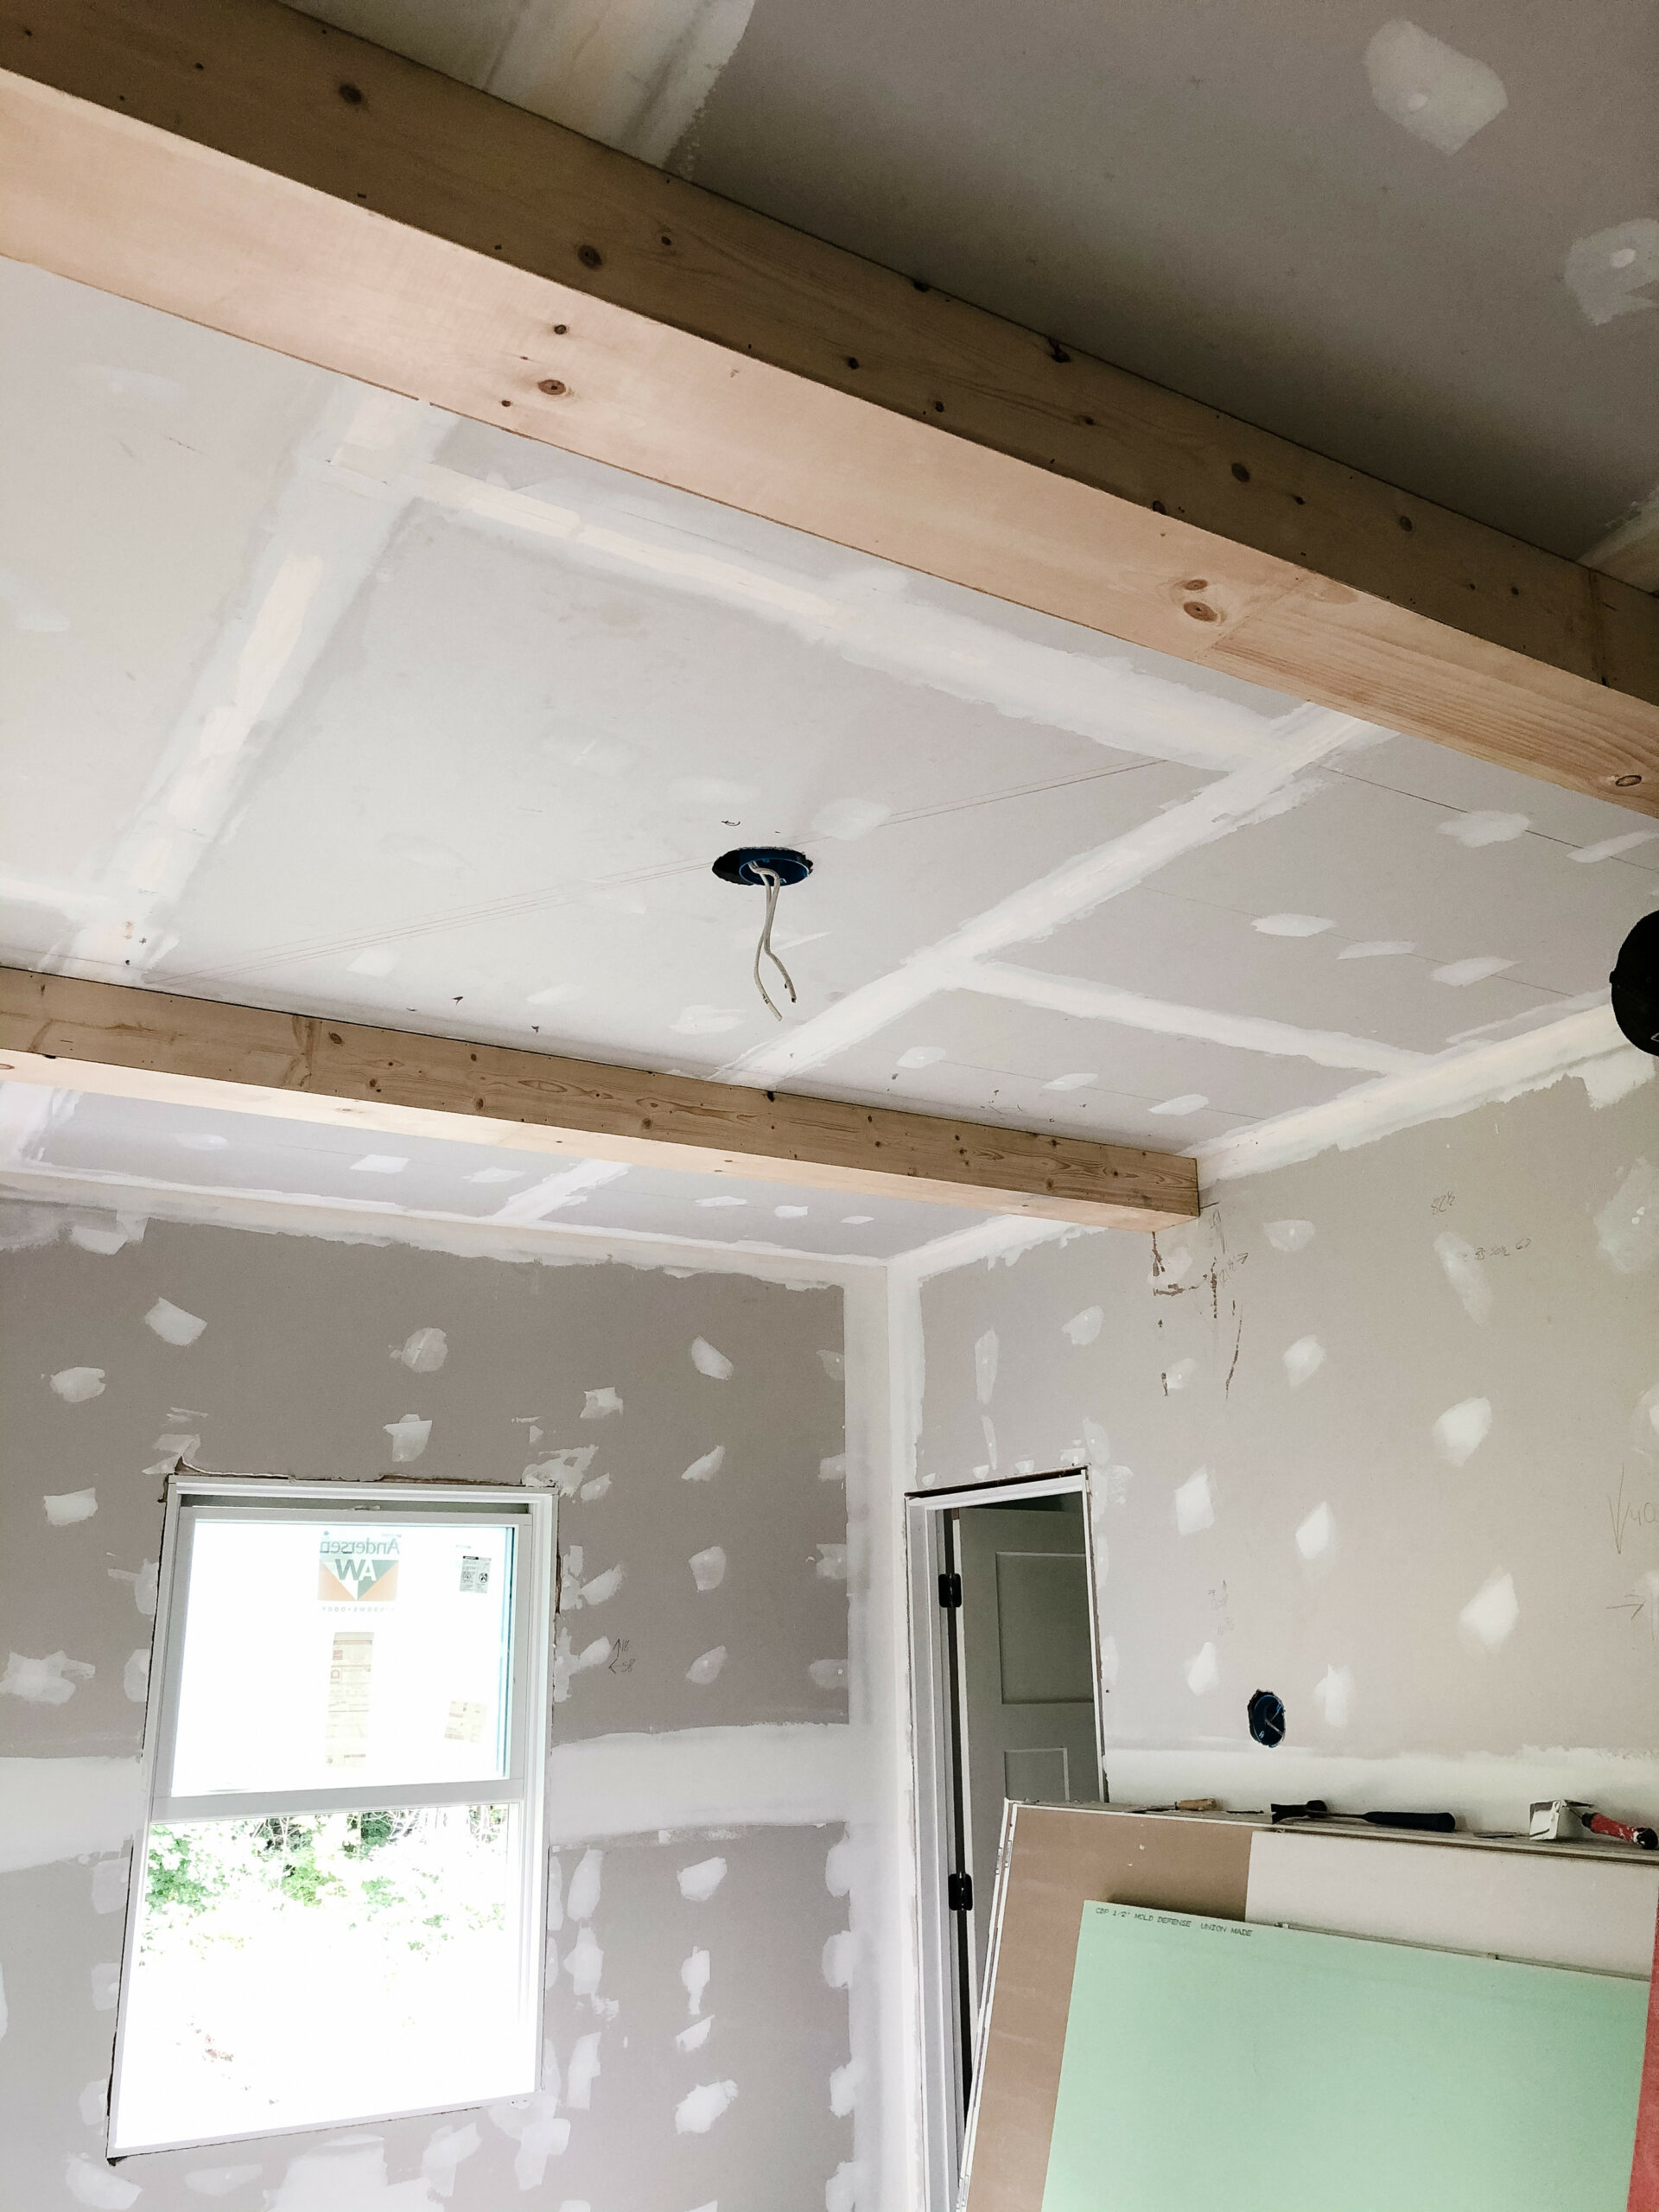
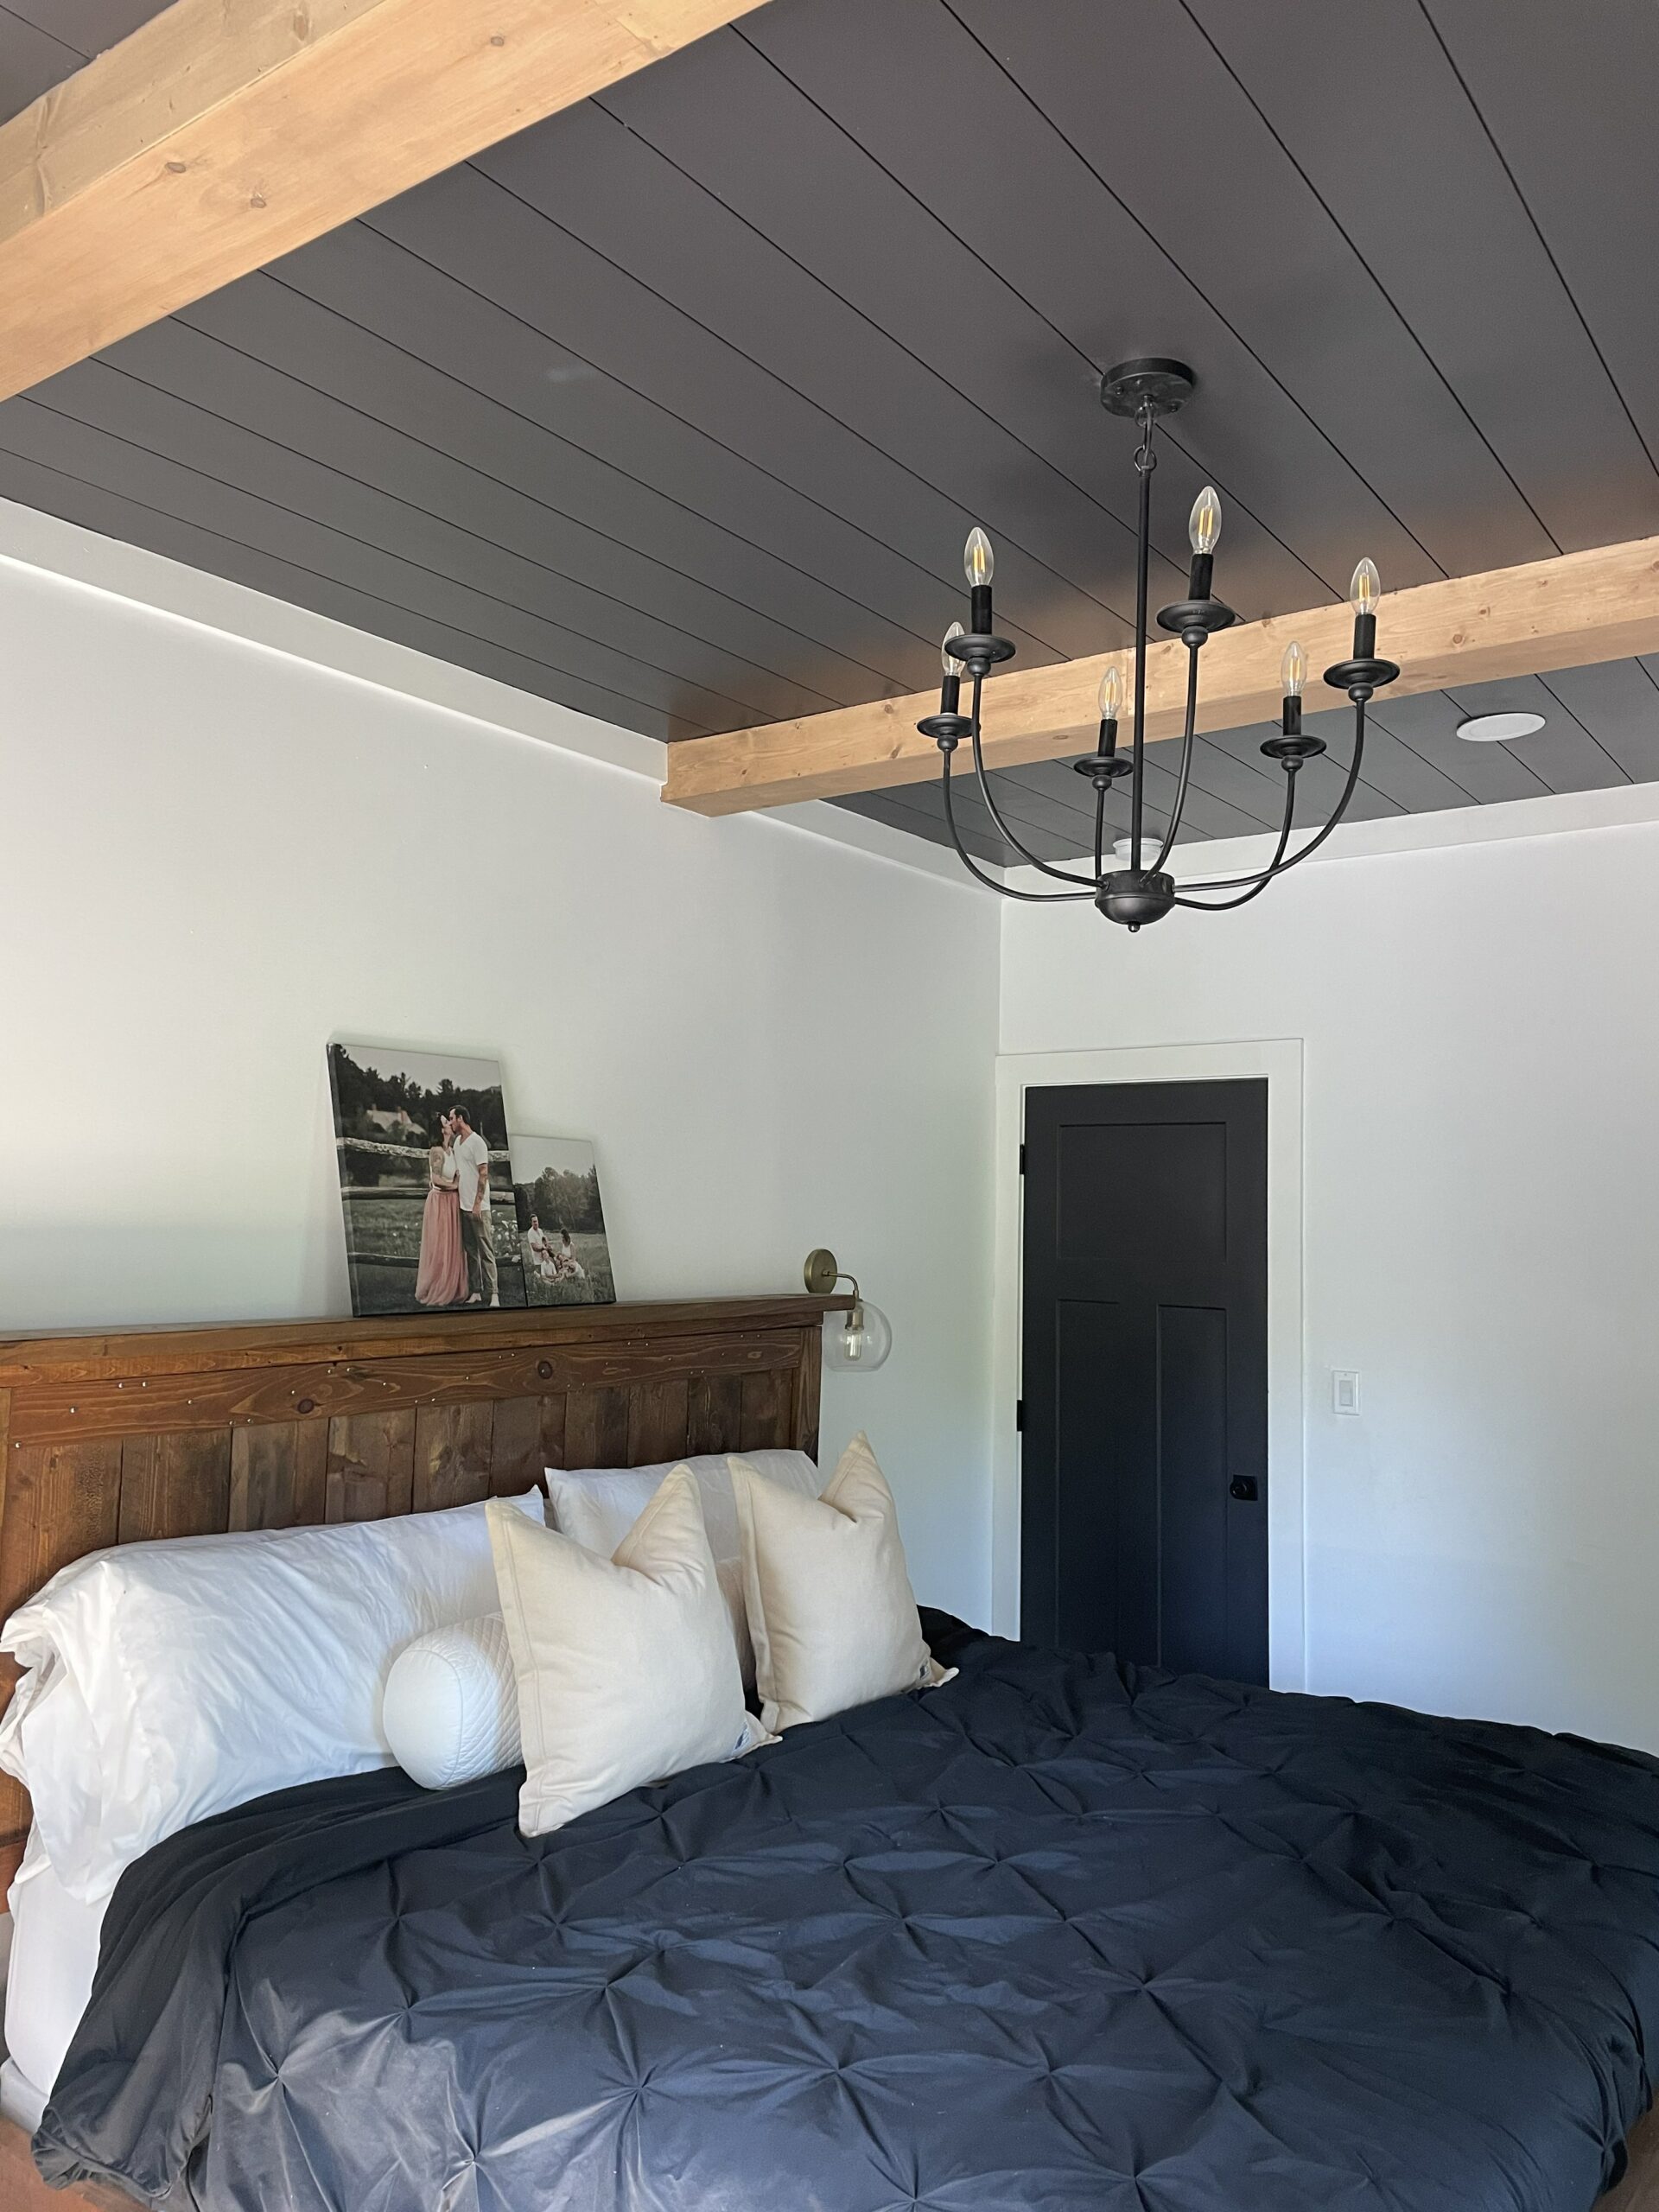
Now that we have our box beams up, we are adding shiplap to the ceiling to finish the look! For this part of the project we have teamed up with Royal Building Products and are using their PVC nickel gap shiplap. We love this shiplap because it is made out of PVC material so it’s really light and easy to work with! Since the nickel gap is already factored in, there is no need for spacers and makes the install much quicker and easier!
Some may say shiplap is a fad, but to me, it adds so much character and can really change any space! We decided to mount our beam first and then run the shiplap in between the beams. For this project the materials we used can be found below.
Materials:
- PVC Shiplap
- 16g Brad Nails
- Brad Nailer
- Miter Saw
- Tape Measure
- Speed Square
- Level
What I love most about this project is you don’t need a lot of materials and anyone can do it! Since the shiplap is made out of PVC, the boards are lightweight and easy to hold while you’re working. This was definitely something I appreciated after lifting those beams up!
Step 1: Measure
You’ll want to first measure your sections where the shiplap will be installed. For us, since we have two beams on our ceiling, we measured 3 sections. It is important to measure in 3 or 4 different locations along your ceiling to ensure that your room is square. If you notice that your measurement starts to change at all, you’ll want to cut your shiplap only a few pieces at a time. I recommend cutting your first two pieces then taking your measurement again quickly to make sure you’re on the same track!
Step 2: Mark Ceiling Joist
In order to attach the shiplap securely, you will need to mark your ceiling joists for the brad nails to attach to. Since we are new construction, this was easy for us! If you are working on an existing ceiling, you’ll want to use a stud finder to mark your joists. We have heard great reviews on this one here!
Step 3: Cut
Using your miter saw, place the shiplap board on the saw and measure out your first measurement. Mark with a pencil and draw a straight line with your speed square. This will ensure your cut is nice and straight! Line up your blade with your line on the shiplap board, hold nice and tight and cut! Repeat this process for each board you need.
Step 4: Attach to Ceiling
Once your shiplap is cut to the appropriate length, test fit your board on the ceiling just to make sure everything lines up. For the first piece of shiplap, it is best to use a level to make sure it is straight. If it is not straight, it will cause every row to be off! Once you have the first piece in place, use your brad nailer to nail the shiplap to the ceiling joists. You’ll want to make sure to place a brad nail in each piece wherever a joist lands. On your first piece, put a brad nail along the bottom edge. When you place your next piece on (you’ll see how easy the board slides into the previous board, as I mentioned earlier the nickel gap is already factored in so you’ll feel the board stop when it’s in position!) you’ll put a brad nail at the bottom of your new piece so that the brad nail also goes through the tongue of the first piece. Doing it this way leaves you with less nail holes to fill! Repeat this process until you reach the end! Your last piece will be smaller in width, so you will need to measure the length and width of your last piece and cut to size. We are adding trim along our walls so you will never see the edge of our cuts! Where the shiplap meets our beams, we will be using caulking to hide this seam! You can see more of this process on my Instagram here and here!
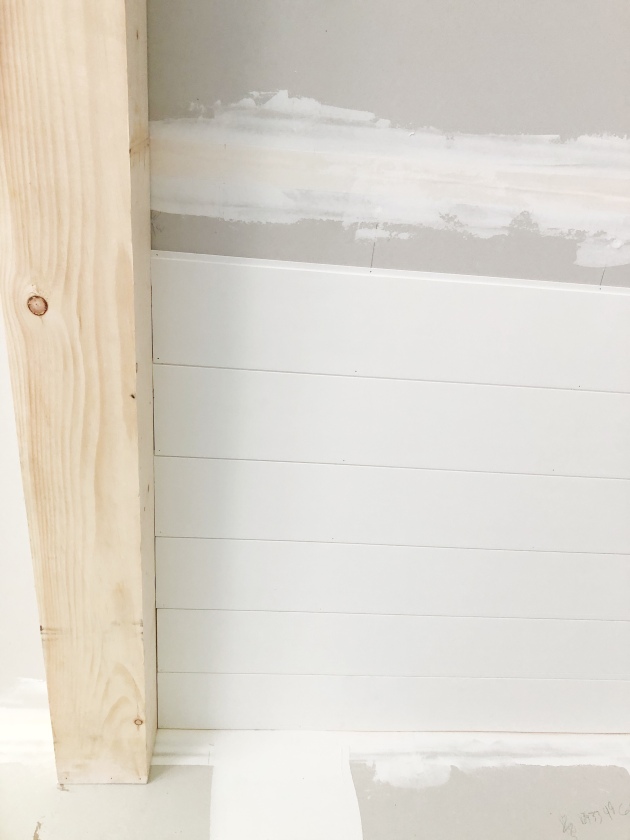
Install the bottom of the shiplap towards the wall and having the groove facing outward to connect your next piece.
Step 5: Paint
We chose to bring on the moody vibes to this ceiling! We ended up using the same black that we have throughout our home, Benjamin Moore Caviar. I absolutely love it! First, I started with a brush and got in between all the gaps. Then I went back with a roller and rolled along each board. This took two coats with some areas needing a quick touch up!